
There is a gruesome twist to this post – you have been warned!!! But if you don’t wish to see the result of murderous intent, you can just scroll through the first few photos 😉 Then there is a very long tutorial section then right at the end you will find what you are looking for, if you possess macabre interest…
It’s Bestie Birthday Cake time of the year again, and in line with previous years E posed to me a greater cakey challenge than ever before: a standing doll (my first structured cake)! How could I resist such a challenge, especially since I had a winning card up my sleeve…
Last November I attended the New Zealand Cake Decorator Guild’s national conference, where the very talented Nina Blackburn of Make Pretty Cakes held a series of workshops on the topic of… a standing doll cake! (The cake she taught was the same as the one advertised here). I was super impressed by her ingenious use of a chocolate platform with armature, which she also teaches for another of her fabulous cakes, “Señor Taco”. You can find her tutorial for that cake and the chocolate platform method on the Pettinice Tutorials page here. If you ever get a chance to attend a class with Nina, I absolutely recommend her – such fantastic skill and a great friendly teacher!
As keen as I was to try out everything that I learned in Nina’s workshops, there was a slight snag. Well, a big snag. I didn’t have a kitchen. Hmm, not quite true – I didn’t have a kitchen of my own. We’ve been living with my lovely in-laws for the past couple of months and were only due to move into our own place the week after Bestie Birthday celebrations. Fortunately, I have a very gracious MIL (have I mentioned that about her before? Because it’s true! And because I know she reads this blog!! ;-)) who lets me go to town in her kitchen whenever a cakey urge comes upon me. Even still, it was a big ask to take over the kitchen bench for hours a day during the week leading up to the party.
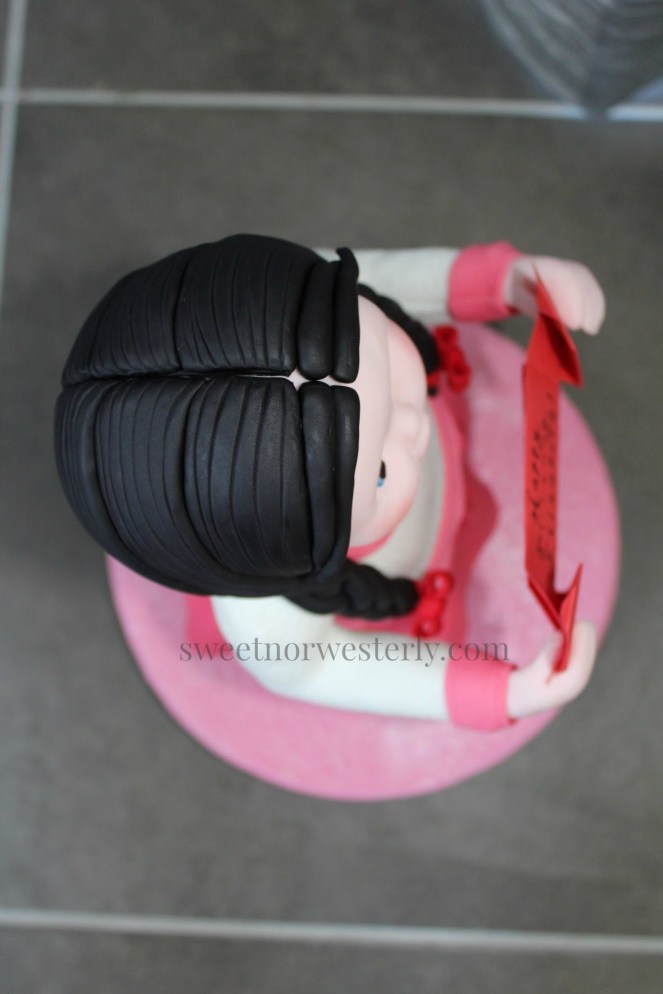
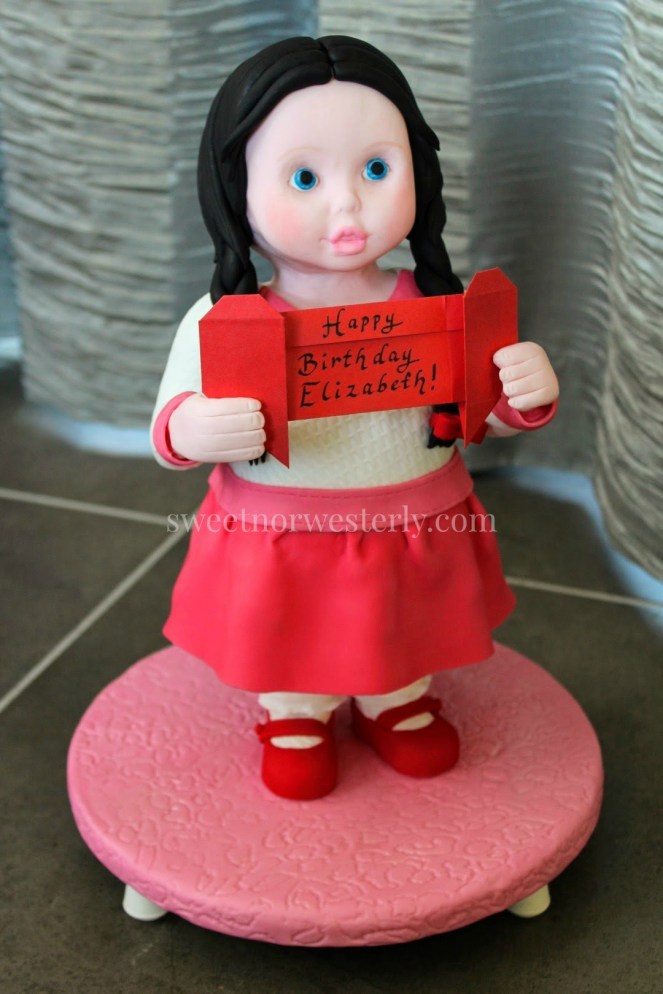
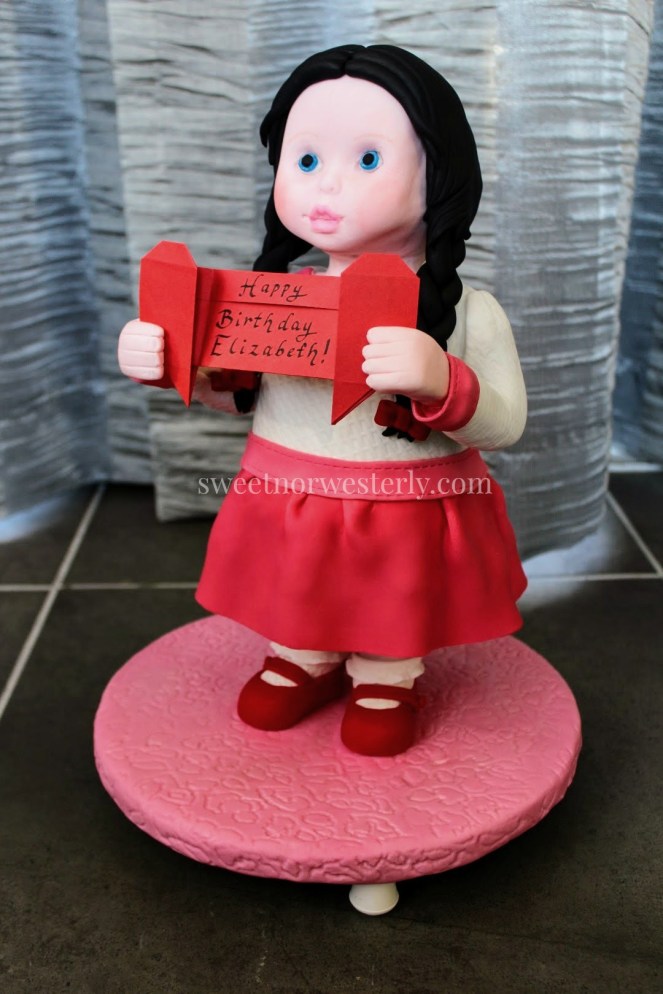
And hours she did indeed take. I don’t know how Nina managed to do hers so quickly – much practice (and more talent than me) is my guess! But as you can see, I did get to the finish line…er, finish-origami-heart? I chose the heart because origami is one of E’s favourite hobbies. It was going to be a secret addition, but she guessed it anyway! I tried to make it out wafer paper but it’s too brittle to withstand the folding so had to go with non-edible paper.

May I present Ebony, so-named for her hair colour – is black a colour?!
In this post, I want to share a few of the neat techniques that I used to make her. Some were influenced by what Nina taught, others are things I figured out on the way. If you still have questions leave a comment and I will try to help out 🙂 I learned HEAPS at the workshops and during the process of making this cake, so I hope you will too!
Internal structure
I won’t share the detail for the internal structure, because a) you can find great instructions in Nina’s Señor Taco tutorial here for how to set up the hardware and use a chocolate platform, and b) Nina has developed and teaches classes on this method so it’s not mine to share! #cakecopyright
For the (small) actual cake component I made a chocolate mud cake using a half quantity of this simple butter-free recipe from the Chelsea Sugar website, cooked in a loaf tin. It survives well under ganache and fondant at room temperature for several days and isn’t too bad for carving. Two slices of the cake sandwiched together with ganache make up the front and back of the body, which I then carved to get the torso shape.

Making the head
When Nina demonstrated this cake she used a ball mould inside the head but I couldn’t get hold of one for the life of me! Rather than go out and buy a ball that I could make a mould of like I did for the doll’s face, I have a quicker solution: silicone muffin trays.
I melted compound white chocolate buttons and filled the muffin holes to a level three-quarters full, making sure to coat the sides thickly, and let them harden in the fridge. Then I popped two cooled chocolate muffin shells out of the tray and stuck them together around a central skewer (to hold the head to the body) with more melted compound chocolate. The head sits on top of a roll of ganache for the neck as you can see below.
")
")
Ganaching the body (and thickening too-thin ganache)
Taking Nina’s advice, I used compound milk chocolate to build up the doll’s limbs for its long working time. Initially I tried a 3:1 chocolate to cream ratio by weight but found it was still runny after a day in the fridge. Maybe it was the brand of chocolate I used (Pam’s from New World supermarkets) or maybe I didn’t weigh it carefully? Not that I was too busy eating the chocolate… I managed to get the correct consistency by slowly heating up the too-runny ganache in the microwave then melting some more compound milk chocolate in a separate jug and mixing it a little at a time into the ganache. Next time I’ll start with a 3.5:1 ratio.
You want to be able to easily squish together, roll and handle the chocolate – like I have into the ‘interesting’ shape below – but solid enough that it will hold and not slide off the cake structure.

When I used this ganache to cover the body, I heavily relied on Nina’s pictures to get the right shape: a slightly bulging (convex) little belly and an indented (concave) back.
")
")
I compared the cake with the real doll that I was using to make the face mould (more details below) to make sure I created raised sections on the face where it was more rounded, keeping in mind that the face mould needs a solid structure to support it in the right places.
I think the hardest thing about this part of the process is to not make the limbs too thick, because the fondant layer(s) that will cover them add further thickness. In the photo above the head looks quite small but I knew that the face and hair fondant would add thickness.
Making the face using a DIY mould
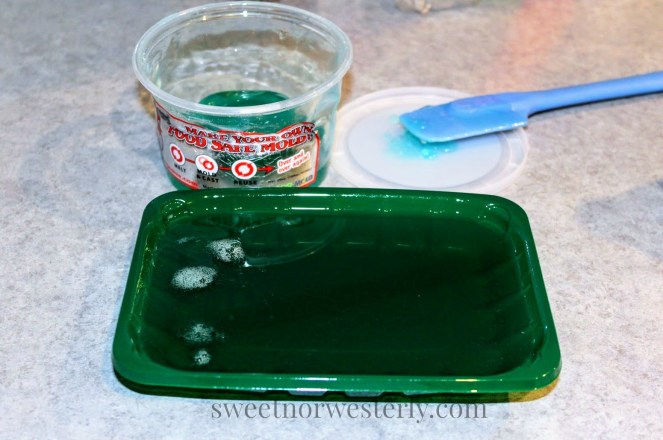
I don’t have a store-bought face mould, but I do have the Evil Cake Genius reuse-a-mold – a fantastic product that helps you make a mould of virtually any shape you need, then melt it down and create something new. I have both 10 oz and 20 oz quantities, and I used the 20 oz for this mould but didn’t need it all, so next time I would just use the 10 oz and make the mould in a smaller container. If ordering from the US is too big a mish for you, I see that Bake Boss sells single-use silicone mould putty here.
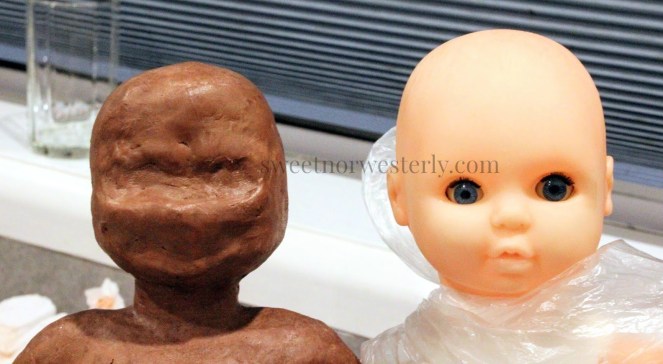
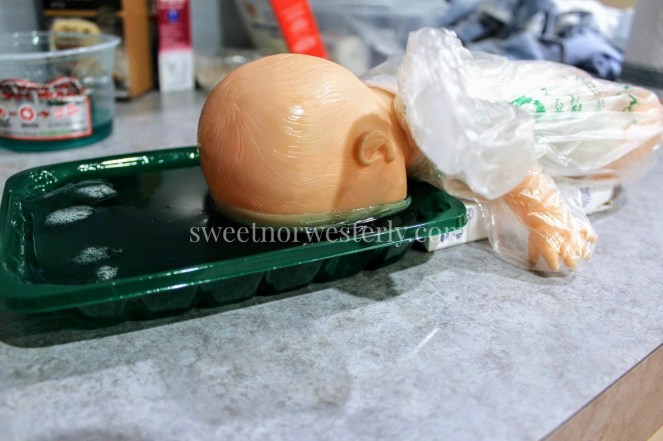
A kind friend loaned me a doll with a cute face to use as my mould ‘master’, and a mushroom tray from the supermarket turned out to be the perfect disposable container to create my mould in.
To make the mould I melted down the reuse-a-mold in the microwave according to its instructions but the container it came in didn’t react well – you can see in the picture below that it warped a bit. Perhaps my in-laws’ microwave runs hotter than mine? If you’re unsure how long to melt this stuff, short bursts are best! After each burst I actually poured off the melted mould (the outside melted first) until I had enough to fill my mushroom tray. It stays hot and workable for a good 15 mins so you don’t need to rush and risk burning yourself. Not speaking from experience or anything…
Any air bubbles in the melted mould will prevent it from taking your mould master’s shape so try to avoid them.
I prepared the doll by taping over its eyes and eyelashes so the melted mould didn’t seep into the doll and wiped spray oil over its whole face. And I protected the rest of the doll by wrapping it up safely since I got quite sticky fingers with that oil.
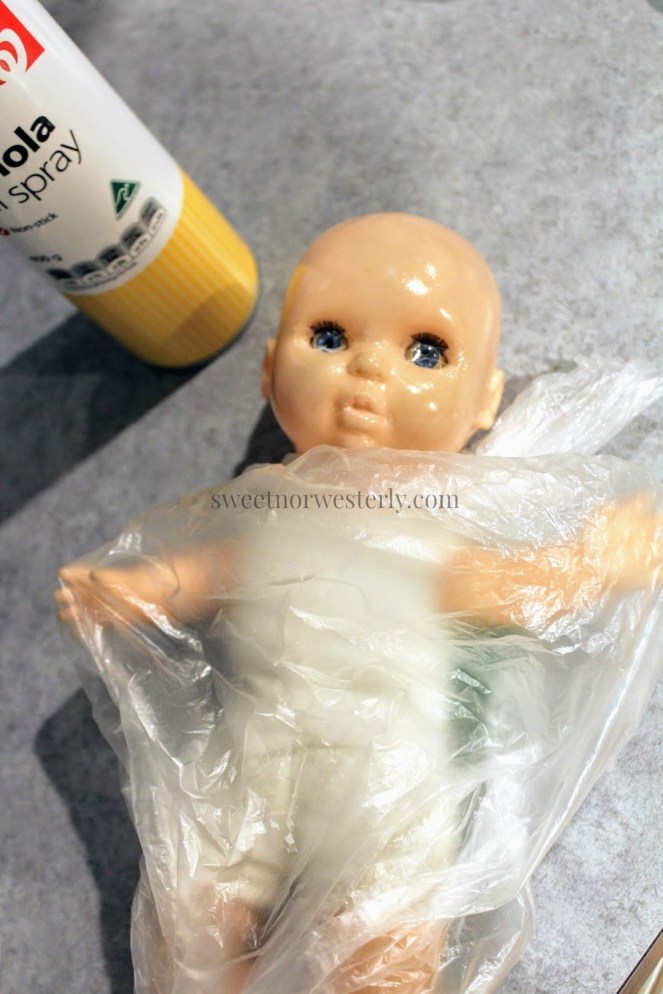
I waited about 10 minutes after adding the last of the melted mould into the mushroom tray before placing the doll in it so that she didn’t sink to the bottom. Then I checked that some surface tension had formed by poking a spatula into the edge to see the mould bulge upwards slightly at the edge of the tray. When there was some surface resistance but the mould medium was still fluid, I carefully lowered the doll’s face into the mould. I kept the body balanced on a book at the same height as the top of the tray so that my mould would end up roughly flat.
And so I drowned the doll. Yup. She was under for well over a minute so I’m pretty sure she’s dead.
As you can imagine, shrieks of surprise and laughter erupted when various family members walked into the kitchen at this point.
When the mould had set cold it was easy to remove from the mushroom tray, then I carefully peeled it off the dolls face. Here’s the mould I ended up with – somewhat horrifying but useful 😉
")
")
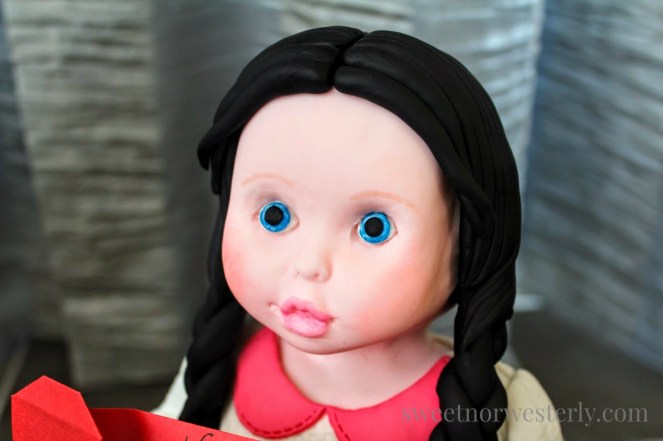
The face is then made by filling the mould with smooth fondant, freezing it for a few minutes, carefully removing the fondant and leaving it to come to room temperature (especially if condensation has formed on it, leave it in a cool spot until it is no longer shiny and wet before handling it!).
")
")
Next I had to create holes for the eyes – very ‘Minority Report’. Then I attached the face to a layer of skin-coloured fondant that covered the face and head (‘head-skin’), then blended the two together – dolly gets a face transplant!! Blending is easiest when the face fondant and the head-skin fondant are freshly applied – later I noticed cracking around the neck because I had applied the head-skin fondant too early then had to wait til my face mould had come to room temperature to attach it, and by then the head-skin had dried out too much.
")
")
Covering the cake board
Because the internal structure involves bolting threaded rod to the cake board, I decided to cover my cake board after the hardware was sorted out to avoid accidentally munting it somehow. This creates the problem of how to make the covering look like one piece of fondant when it is definitely two.
Bakel’s Pettinice to the rescue: I wiped the cake board with a little water, cut out two semi-circles of fondant, and attached them across the foot-line of the doll (where the bolts go into the board), then I blended the seam together with my fingers and a little white fat (Chefade). I’m sure cake decorators have been pulling hacks like this for decades, but when the idea occurred to me I was over the moon – and it worked!!!
")
")
")
Even if I wasn’t totally happy, it wouldn’t matter because I wanted to have a cool embossed board with a pattern that would hide the seam. I went for this cute leopard print one which I applied using a small rolling pin, angling the design to fit between the legs and around the side of the board. I found that if I didn’t roll it evenly some areas would be less imprinted than others, but I convinced myself that by brushing Rolkem pearl lustre dust over it all no-one would notice!
")
")
")
Dressing her up
Nina’s doll cake was wearing a dress but I wanted more colour variation for Ebony’s clothing so I opted for a skirt and top. To imprint the ‘smocking’ pattern I used this embossed rolling pin, which turned out to be more of a basket weave but did the trick anyway. After wiping the ganached cake with white fat I cut two t-shirt shapes and embossed them then attached them front and back, folding over the fondant’s edge for the shoulder seam. Some areas did lose their pattern a bit especially near the seam, so the general rule seems to be the less you touch the fondant, the better. My new Sugar Shapers were super helpful for creating tidy seams.
")
")
When it comes to figurines/people-shaped things, I hate making arms – they never seem to hold in place and they’re so hard to cover with fondant. Fortunately wire was supporting these ones from the inside so I only had to worry about dressing them.
It took me a few goes to figure out what worked for making and applying sleeves to the top but in the end I came up with the shape in the first photo below, embossed it and made a cut to help wrap it around the doll’s right arm. The rounded (top left part) is supposed to sit at the shoulder as the seam, and the flap created by the cut wraps around to meet the bottom part. There’s a bit of squishing involved to make it fit, and I put a bit of white fondant under the armpit in case the arm showed through at the cut. The sleeve seam was made by cutting the flap to the right length.
")
")
")
")
And because I’m kind and don’t want you to hate arms like I do, I’ve included a couple of pictures of the little hands I made. These were made of the skin-coloured fondant with a small amount of tylose added so they hardened quicker and were attached to toothpicks that stuck into the arms.
")
")
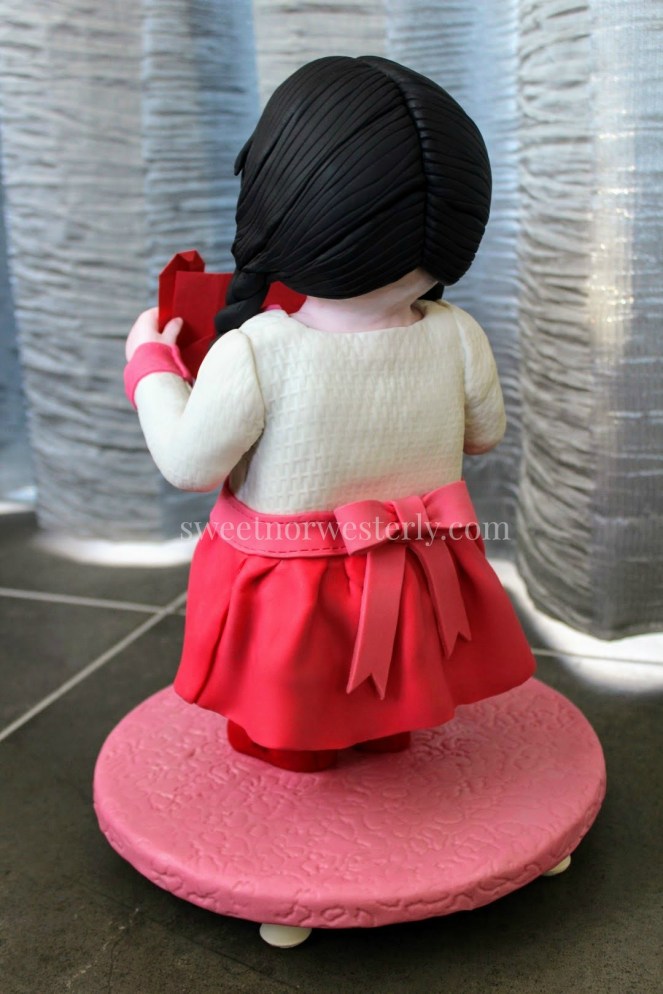
Making the skirt was more easy and fun – first I made strange nobbly(?!) bits around the base of the body with fondant to make the skirt poof out a bit. These were smoothed onto the ganached body, keeping with the age-old cake deco wisdom that ‘any bump on the cake surface will be amplified by the fondant’.
")
")
The skirt itself was a simple rectangle gathered along one edge to create a ‘waist’ and attached using white fat, arranging the gathers over the nobbly bits (I really need to come up with a better description for them!). Using sharp scissors I cut the skirt to the length I preferred when it was attached.
")
")
The waist is easily hidden by a belt, which I made from a lighter shade of the skirt fondant rolled into a strip and cut with a quilting ruler – the secret weapon for straight lines.
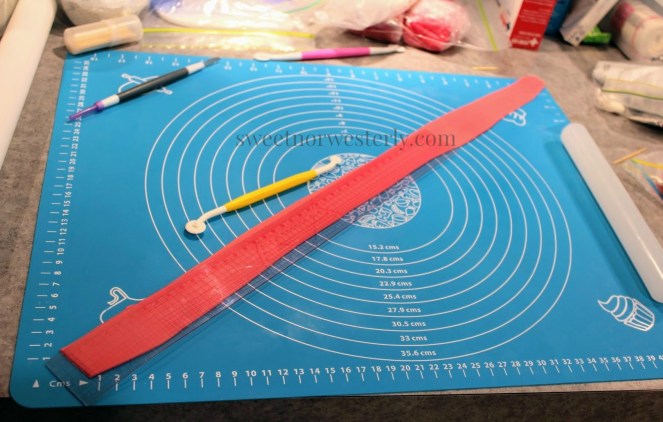
If you dust the underside of the belt fondant with a good amount of cornflour you can roll it up like a snail and easily apply it directly to the waist greased with white fat. Or you can forget the cornflour and have it stick together, stretch and threaten to break, like it did for me. Your call.
")
")
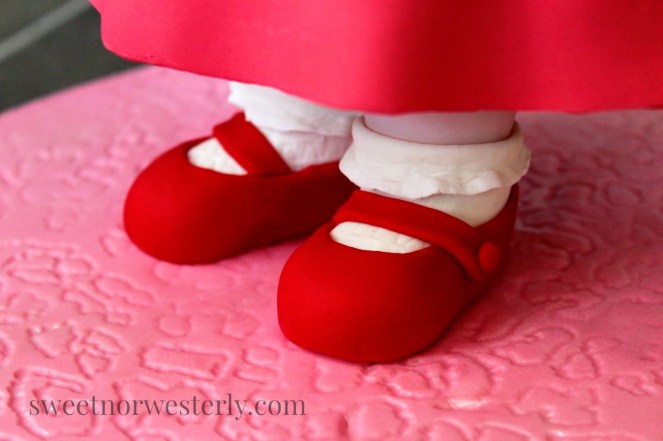
The rest of Ebony’s attire was pretty straightforward: two lapels with a quilting stitch along the rounded edge, cuffs made the same way as the belt, and cute little red shoes and white socks made according to Nina’s directions.
")
")
Doing her hair
E had requested black hair braided into pigtails, so I greased up my hands with white fat since black fondant stains like crazy. Oh and I covered the white top with plastic wrap to protect it while I was sorting out the hair, for the same reason.
I covered Ebony’s scalp with patches of ebony so the segments of hair didn’t show odd patches of skin fondant between them.
")
")
To work out how much fondant I needed for each braided pigtail, I shaped a lump of fondant into roughly the right size, split it into three roughly equal segments, rolled them into balls then into strands of ‘hair’ to plait. Most people know how to plait hair, so I’ll spare you a painful description and let you look at the pics below. Once plaited I found I needed to gently squish the strands together so they stuck without too many gaps. Just white fat was used to attach the finished plait to the scalp.
")
")
")
")
")
")
")
")
")
")
To do the hair that covered the scalp, it helped me to work in four sections so that I could tie them into the plait. I’ve shown some of them in progress below (click the individual photos below for bigger versions). The segment shown in the first two photos was the hardest as I had to blend part of the tip into the plait – best done while both segment and plait fondant is soft. A few lines indented across each hair segment after it was attached to the scalp are simple but effective for detailing.
")
")
")
")
")
")
Lastly, a few bows came together easily from rectangles of fondant doubled over and squeezed in the centre, then fastened with a thinner rectangle wrapped around the centre. Paper towels rolled up are great for keeping bows in shape while drying. I probably should have left them overnight to dry but I applied the red bows – over top of a red strip tied around the end of each braid – with sugar glue after an hour or so. Pretty sure I added some tylose to the large pink bow for the back of the dress and let it dry for several hours before applying it with a splodge of fresh fondant.
")
")
")
")
You made it to the end! Nice work 😉 Here’s your reward: decapitation and violent dismemberment!!!


That’s quite enough horror for now – I think I’ll need awhile to recover before attempting something like this again, but I learned so much and would do a few things differently in future (eyes and hair detail in particular).
Last week we moved into our new house and I’m looking forward to whipping up some excitement in the kitchen over the next month or so – stay tuned for that! I also have some belated photo shares that I hope to post about soon, so look out for those, too. Remember you can subscribe via email so you’ll be notified each time I post (roughly once a month, I won’t spam you) and you can follow me on Instagram @sweet_norwesterly where I share whatever I’m whipping up xo


THAT IS INSANE. Oh my gosh. I can’t even believe the work that went into making poor little decapitated Ebony! I feel like I could mess around making cakes for 10 years and never be able to put together anything as cool as that. As you know, fondant and I aren’t the best of friends 😛 That’s really amazing. How long did it take you from start to finish? I assume you had to break it up in different stages. Is your kitchen a huge disaster when you finish cake decorating? You should see mine…it’s seriously nuts. Buttercream all over the place! I particularly like it when I go to get a drink later and find it on my refrigerator door handles. I should take a picture sometime lol.
LikeLike
TBH Amanda, I wouldn’t have imagined that I would ever attempt such a thing… until it was all unpacked and explained to me in the workshops 🙂 This first-ever attempt would have taken upwards of 20 hours spread over a week, but I was making up bits (and photographing them!) as I went so I expect to get it down next time(?!). I am sure you could make something like this – did I ever mention that the first time I tried to use fondant I swore to myself iwillneverevereverdothisagain ??!! Grit your teeth and do keep at the fondant 😉 And yes, after decorating my kitchen is covered in a thin film of icing sugar and *someone* has wiped something sticky on all the door handles, too… Do take a pic, we can compare!! P.S. great to see you had a good time in Mexico – keen to see how your desserts are inspired by your time there!
LikeLike