
It started with a Donna Hay magazine.

I love her simple, elegant food styling and delicious – often decadent – ingredient matching. And I love even more the tasty themes of the her latest issue – especially a whole feature on s’mores!! I made the s’more caramel slice (the first-ever recipe involving marshmallow that I have made) and it was delish.
That is, once I got the hang of reading the recipe correctly. Let’s just say there’s a biiiiigg difference between 2 tablespoons of gelatine and 2 teaspoons of the stuff…! So after attempt #2 of making the marshmallow for that slice, gelatine and I are better friends.
Having ‘mastered the mallow’, I was curious to try an alternative flavour to the traditional sweet vanilla, and what better flavour would hide any fumbling experiments than chocolate?! (It’s true though, I’ve even hidden tofu behind chocolate… FACT!)

And so this choc mallow slice was born.
I did opt for a different marshmallow-making method (try that for a tongue-twister!) than DH’s recipe. I like the light texture and rich flavour that the addition of egg whites give this mallow, and I’ve found that corn or glucose syrup isn’t required (more on this here plus some delicious flavour variations).
I’ve also used gelatin sheets instead of powder because I like its finer consistency that blends easily with the hot sugar syrup, but you should get a similar result if using gelatine powder properly. I’ve included some suggestions after the recipe if you’d prefer to use the powder instead, however please note that I haven’t tried using gelatine powder to make this recipe myself, so it is guidance only. Here is a good primer on gelatine if you’re not familiar with it.
All in all, marshmallow is pretty forgiving and this is a great way to try making it for the first time.
Or a second, third, tenth, etc.

Chocolate Marshmallow Slice
Adapted from Donna Hay and Good Food Channel.
Chocolate Base
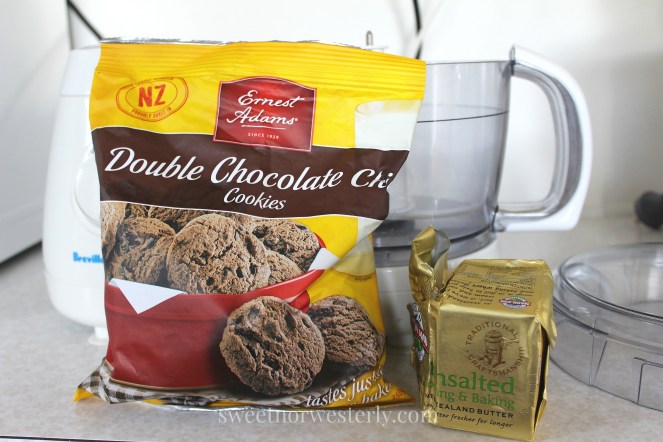
- 250-350g chocolate biscuits (depending on the size of the packet – I used Ernest Adams cookies, shown below)
- 125g unsalted butter, melted
Put the biscuits in a food processor and process/pulse until fine.


Add the melted butter and process until combined. Using a spoon, press the mixture into a 20 cm x 30 cm tin lined with baking paper (check out this post to see how I line tins of this shape).

Refrigerate while you make the marshmallow topping.
Marshmallow Topping
- 9 sheets of gelatine (see note following recipe discussing gelatine sheets vs powder)
- 150mL water to soak the gelatine in and 150mL water to add to the caster sugar
- 1 1/2 cups caster sugar
- 2 large egg whites (approx. 70g)
- 1/3 cup cocoa powder (sifted if you’d like a smooth chocolate flavour or un-sifted if you prefer crunchy choc bits in your marshmallow!)
- 50-100g dark chocolate, roughly chopped, for decoration
- 1 tablespoon vegetable oil
Soak the gelatine sheets in the first measure of water until they are floppy and saturated (approx. 15 mins).


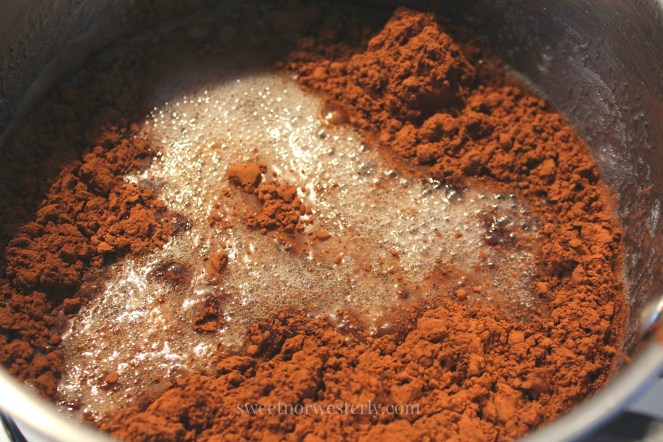
Combine the sugar and second measure of water in a heavy-based saucepan.

Bring to the boil and continue to boil until the mixture reaches 127 degrees Celsius on a candy thermometer (approximately 10 minutes).

Turn the heat off, leaving the saucepan on the element, and add the gelatine sheets (reserving their soaking water) to the syrup, stirring to dissolve them. It might bubble up so make sure you use a long-handled spoon/spatula to stir it.


Combine the cocoa powder (sifted or not, depending on your preference) to the gelatine soaking water, then stir this mixture into the sugar syrup and remove the saucepan from the heated element. (If you are using gelatine powder you will have already put your soaking water into the syrup so just add the cocoa directly to the syrup).

Pour the syrup into a large jug.
Whisk the egg whites in the clean, grease-free bowl of a stand mixer using the balloon whisk attachment until stiff peaks form.
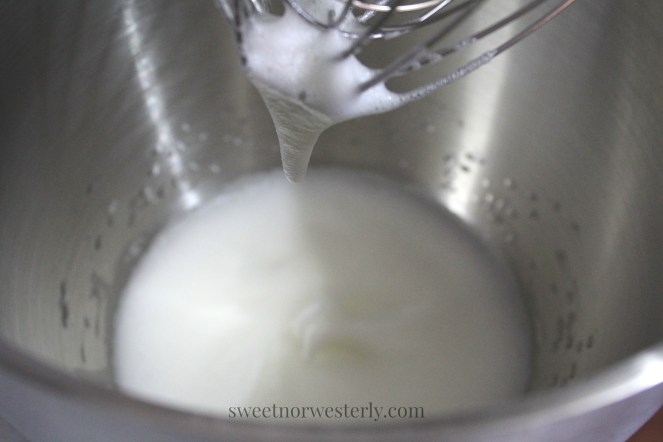
Continue whisking while slowly pouring the syrup from its jug (try to aim the syrup into the mixture rather than the side of the bowl where it will stick like glue!).
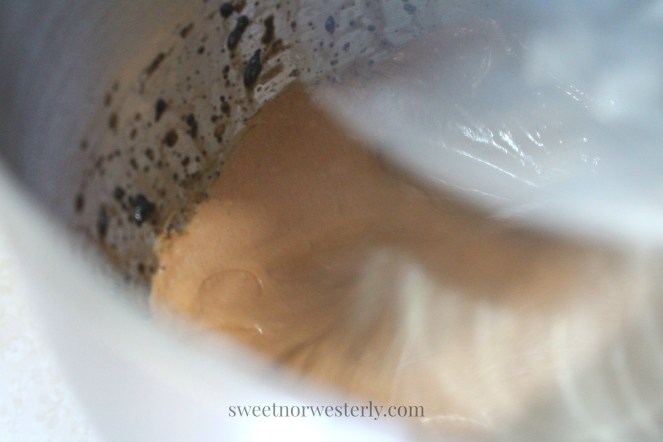
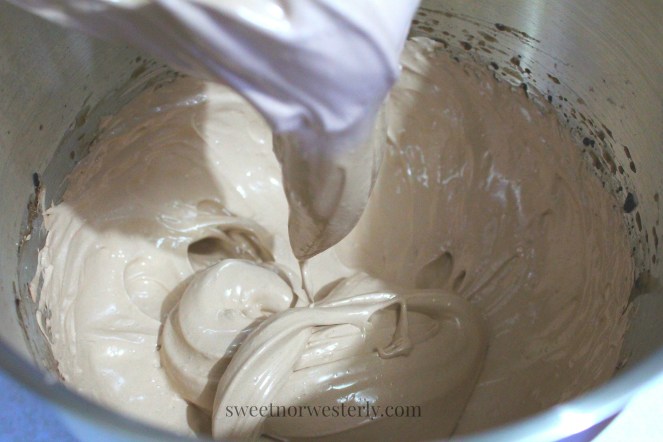
When you have poured all of the syrup into the egg whites, keep it whisking and don’t worry if the mixture looks really runny – it WILL thicken!

See? Not only will it thicken, but it will get shiny and lighter in colour. This takes about 10 minutes, and you can check on it by lifting out the whisk to see if the marshmallow holds its shape, like below.
Using a spatula, work quickly to spread the marshmallow onto the chocolate biscuit base in an even layer. Below you can see some of the little ‘cocoa chips’ from the un-sifted cocoa.

Refrigerate the marshmallow slice for approximately one hour.
In a small microwaveable jug, heat the chocolate at low power for 30 second increments, stirring in between, until liquid. Stir in the vegetable oil.

Pour the melted chocolate into a piping bag (or snaplock bag corner) and cut the tip to a few millimetres diameter, depending on how thick you’d like to make the chocolate lines. Pipe the chocolate side to side across the marshmallow from one end to the other. Then do the same at right angles to the first chocolate lines, like in the photos below.


Cut the slice into servings using a sharp, hot knife, rinsing under hot water after every couple of cuts to keep the marshmallow from sticking to it. If you do this after the chocolate lines have hardened they will crack and might come off… not such a tragedy, perhaps?!

Note on gelatine sheets vs powder: There is a bit of inconsistency across the board about how sheets compare to powder when it comes to getting equivalent quantities of gelatine. To start with, sheets seem to come in various sizes, powder comes in envelopes/packets of differing weights, and gelatine ‘strength’ varies between products. So be warned: there are complicated formulae and tables out there that take into account all the gelatinian factors to convert sheets to powder. However if you’re into taking (moderate) risks, a good rule of thumb (according to various sources) is…1 tablespoon of gelatine powder = 1 x 7g / 0.25oz envelope of gelatine = 3 to 4 gelatine sheets (depending on how firm you would like it to set your dessert/concoction). So for this recipe you could try using 2 & 1/2 tablespoons of powdered gelatine instead of sheets, dissolved in the same amount of water. Let me know how it goes if you do try this!


