
It’s that time of the year that our family celebrates three birthdays in the space of two days – in other words, an opportunity for an epic cake! And this year my lovely mother-in-law was having a Significant Birthday (21 of course!!). So this cake was definitely more of her thing than the other two (men) she shares her birthday celebrations with.

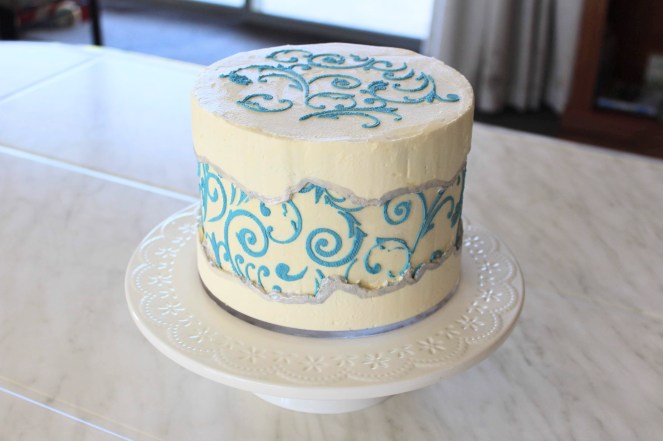
Naturally, I took the opportunity to try a cake design for the first time, and the current trend of fault-line cakes has been calling my name! These involve an attractive pattern ‘fault-line’ along the middle of the cake, partially masked from the top and bottom with roughly applied, then smoothed, buttercream. I chose a stencil that I’ve used before for this wedding cake as the fault-line, because I knew it would look amazing in blue on a white background…which happens to be a combination that my MiL also loves!
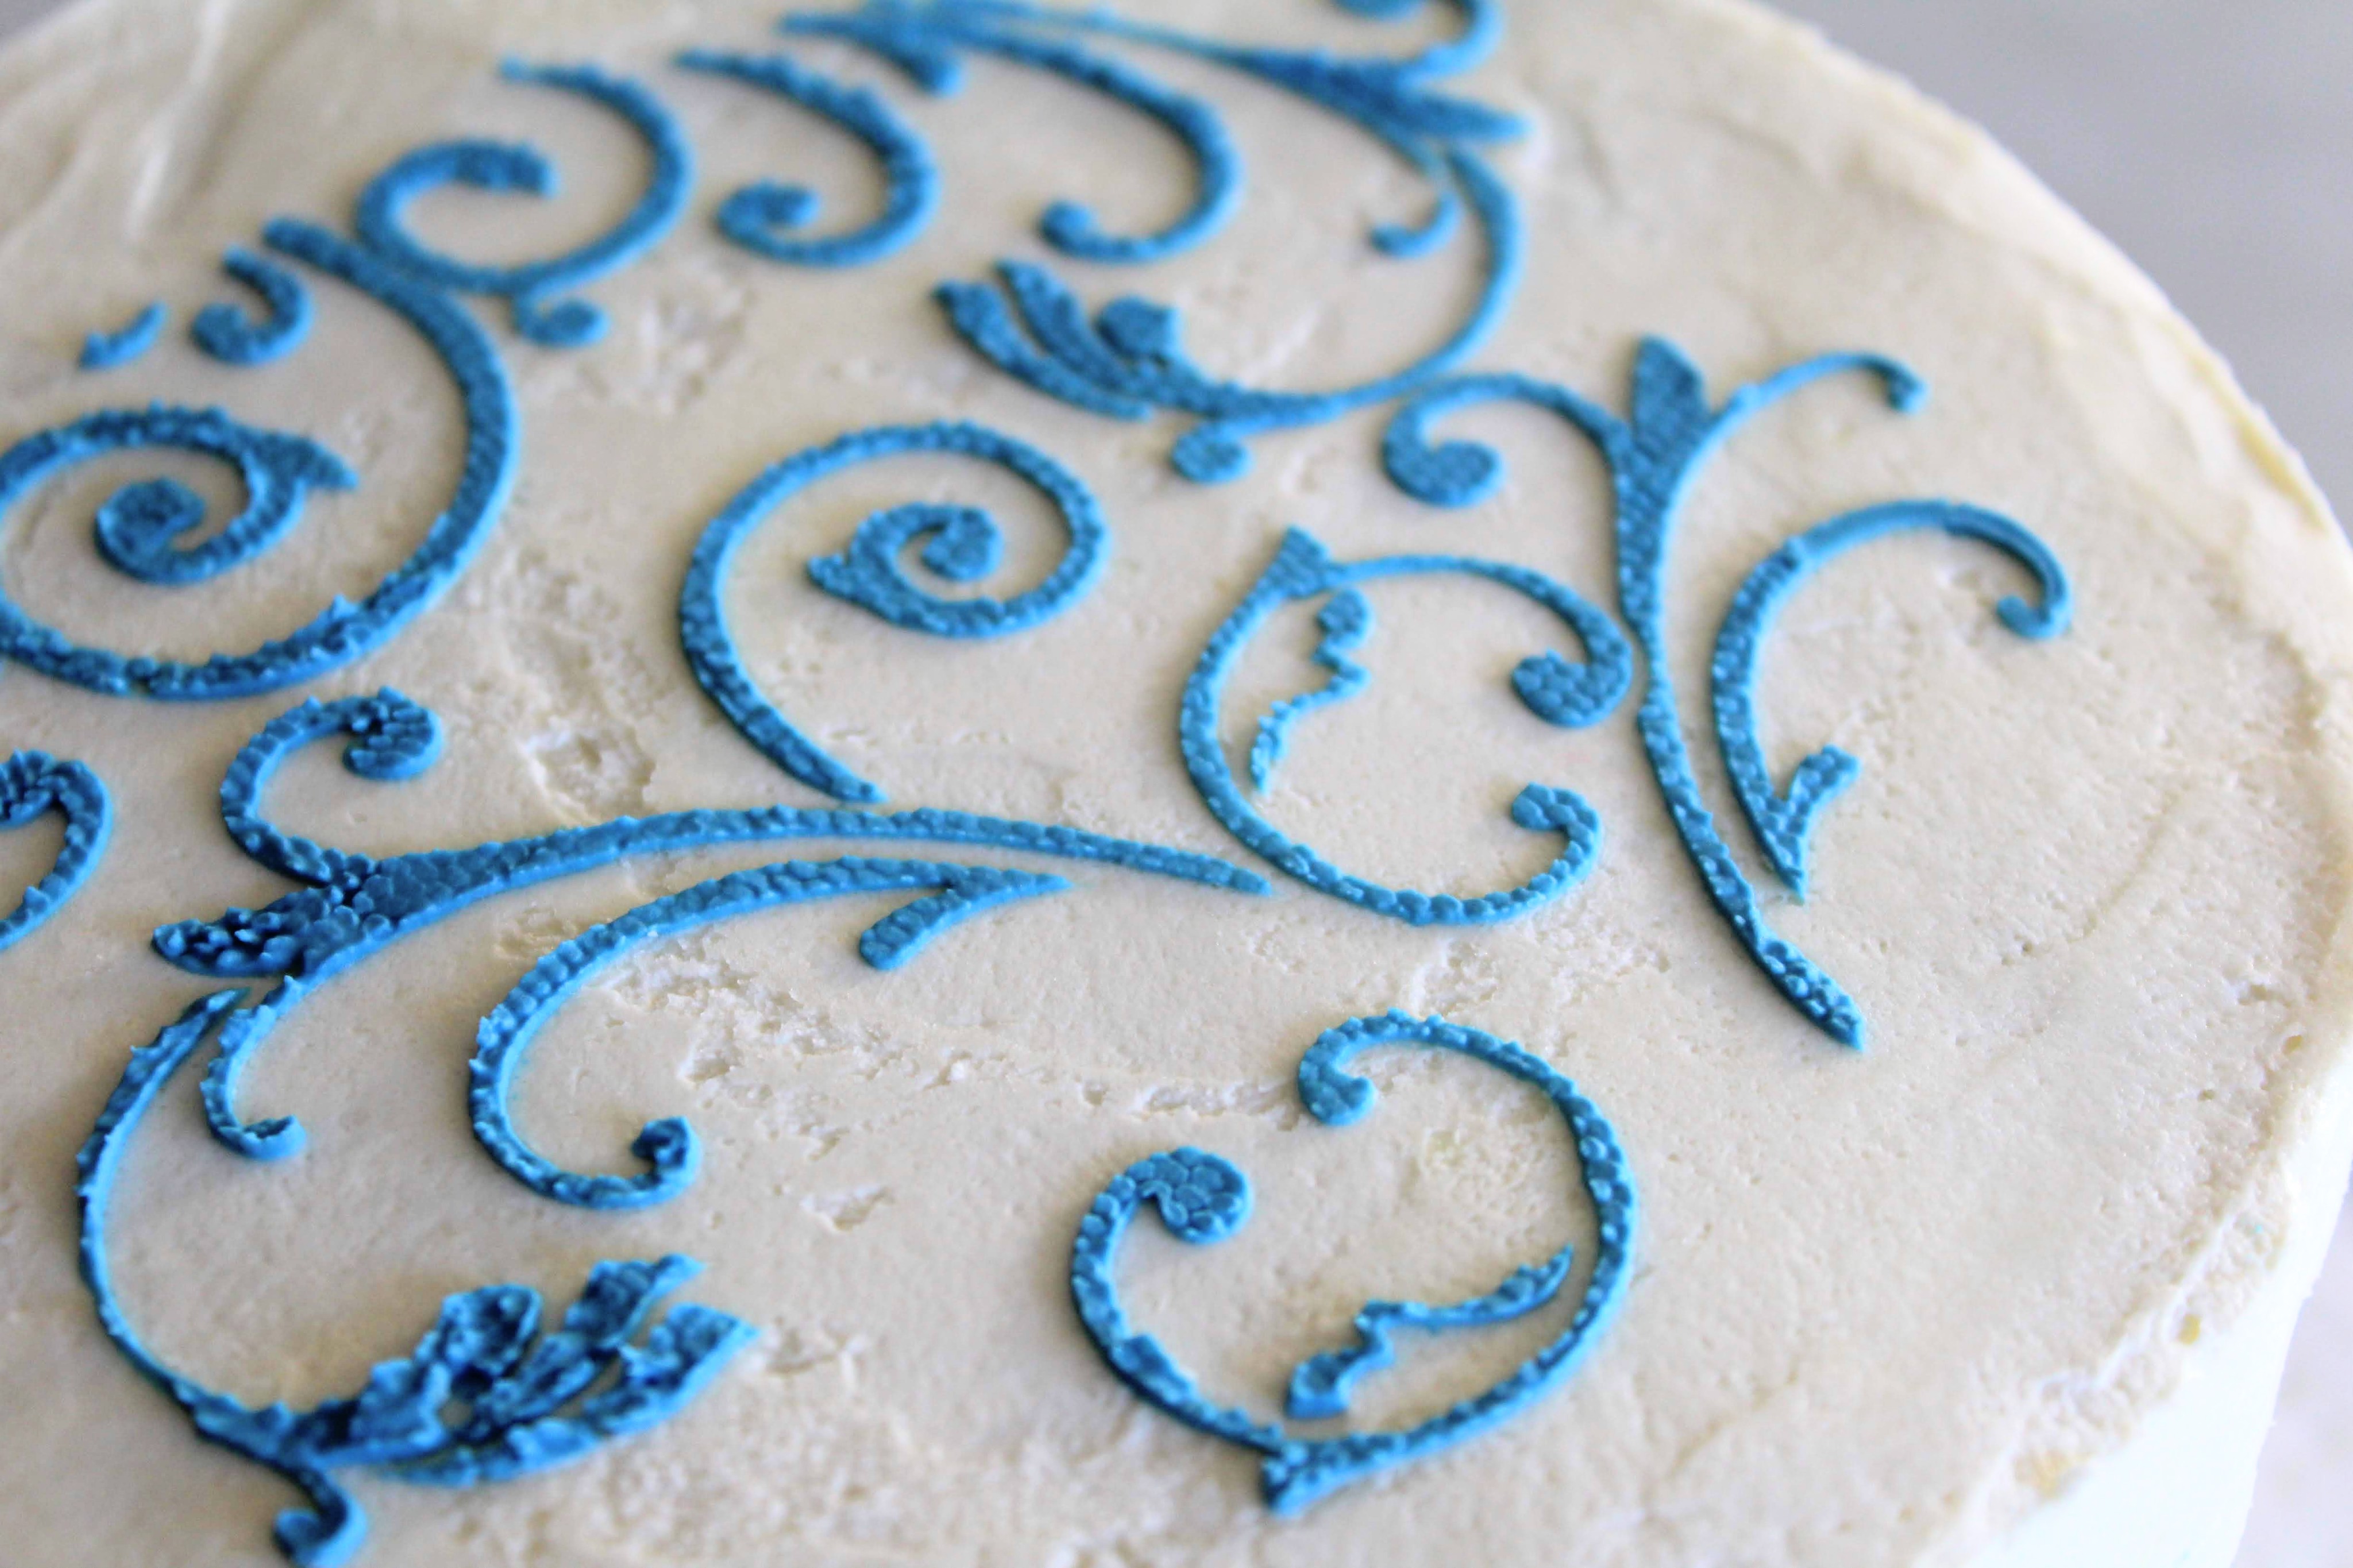
The stencilling is coloured royal icing onto buttercream. I actually prefer to use a premix, my favourite one is the CK icing premix as it’s such great quality, but that doesn’t mean you can’t make your own, as long as you make a very stiff mixture.
I decided to use Swiss meringue buttercream (SMBC) for filling and covering the cake because its high butter content allows it to set extremely solid in the fridge, providing a firm base to attach the stencil on to and apply the royal icing. You might notice that the cake surface doesn’t look as smooth as SMBC usually is – this is because I thought I didn’t have enough SMBC so I mixed it with some American buttercream (butter, icing sugar, vanilla) to make it go further while still giving good stability. I’d still recommend using all SMBC, and next post I’ll share the recipe that I used.
Several things I learned from the process of making this cake:
- Next time I would pipe the edge of the buttercream next to the fault-line to give a cleaner edge that is easier to paint in metallics.
- The buttercream masking (above and below the fault-line) looks best when it’s smooth so it’s important that it extends further out than the fault-line. In some spots the royal icing stuck out too far, affecting the finish of the masking.
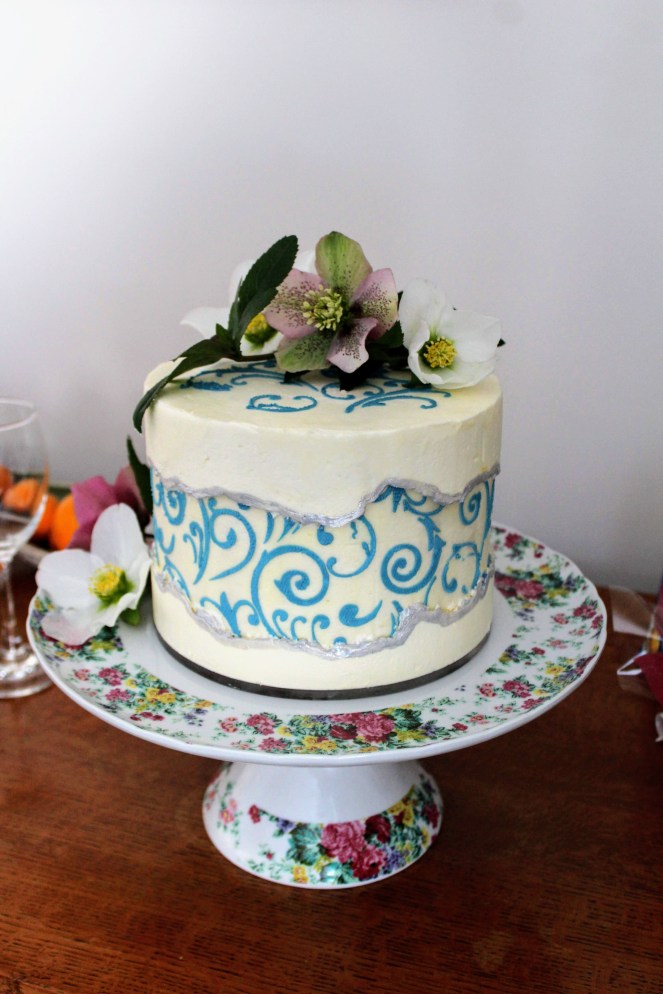
Here’s a photo of the cake sitting pretty at the party, complete with anemones from my garden:

And here are the geeky cake details for you to give it a go yourself!
Stencilled Fault-line Cake Tutorial
- Prepare your cake and buttercream: I used this delicious and sturdy vanilla cake (spiked with lemon zest and soaked in lemon syrup) baked in two 7″ round tins, and cut each of the resulting cakes into two layers. I filled the layers with a mixture of buttercream (I recommend SMBC as explained above) and lemon curd, then trimmed the cake around 5mm so that the fault-line is inset into the cake. Then I lightly/crumb-coat covered the whole cake with buttercream.
- Make the fault-line: First cover the fault-line area with buttercream and refrigerate until solid. Attach the stencil to the cake (I pinned tulle over top of the acrylic stencil I used to keep it flush to the cake, as per the manufacturer’s instructions). Spread stiff royal icing (see photo below for correct consistency) across the stencil; I found it easiest to apply in narrow strokes working from bottom to top, then when the full stencil is covered with icing, to scrape off the excess in one direction (holding the end of the tulle in the opposite direction). My stencil didn’t reach the full way around the cake, so I taped it to a piece of baking paper over the gap for stencilling the first panel. After it was dry (and refrigerated again to keep the buttercream firm) I pinned the stencil into the cake over the remaining section to be stencilled, then applied the royal icing to this (as before).
- Apply buttercream masking: Apply a thin coat of buttercream to the top surface of the cake. Then apply a rough, thick coat of buttercream (extending at least 5mm out from the cake) around the top and bottom of the side of the cake. How far down or up you cover is up to you, making sure a good amount of the stencil is visible. Keep the edges of the masking uneven so it looks like the fault-line has ‘ripped’ it apart! Then use a scraper to remove excess buttercream and make the masking flush with the cake base board. Go back and add buttercream in any sections where there are holes, and scrape again to smooth the side. Use an off-set spatula to scrape buttercream extending beyond the top of the cake, onto the top surface of the cake, creating a straight top edge. Refrigerate the cake to firm up the buttercream.
- Stencil the top: Pin a section of the stencil covered with tulle onto the top of the cake. Apply the royal icing to the stencil as before. Refrigerate the cake (again!!)
- Paint the masking edge: Using edible metallic paint (I used Sweet Sticks) paint a line along the edge of the buttercream masking around the fault-line, approximately 5mm wide.


Have you had a go at a fault-line cake? There are so many exciting ways to follow this trend, I’ve seen everything from fresh flowers to fondant shapes as ‘fault-lines’, so feel free to share links to your cakes in the comments!


I think cut-out shapes would be gorgeous- my vote would be for heart shapes! That lace stencil is so pretty, I bet your MIL loved it!
LikeLike