‘Tis the end of February – the end of summer – and the end of the month of V-Day {which was hard to escape with all the ads trying to sell us jewellery/chocolates/chocolate jewellery…} Did you celebrate Feb 14th with your Significant Other this year?
N and I have had to share our Valentine’s celebrations for the past couple of years: Last year, we accepted an offer to sell our first house on V-Day {yay!!} so we had to rush our dinner and meet our real estate agent that night. This year V-Day fell on the same day as the first meeting of the year for our church home group, so I iced a banana chocolate cake in pink buttercream and we shared the evening with the dozen friends at the meeting {still a fun evening!!}. Next year V-Day might look different again with Baby SN in tow, but I’m pretty ok with sharing the day with others – it’s a good reminder to me that all couples need the support of friends and family to thrive ❤
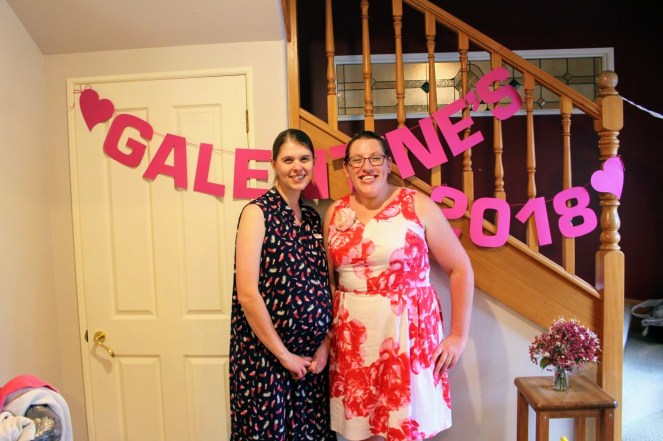
And speaking of friends, my gal pal E and I were keen on keeping up our tradition of celebrating friendship with another Galentine’s Day celebration. So the Sunday before Valentine’s Day we again decked out our church office in pink, red and white, played great games, ate delicious food, and solidified those friendships that keep us sane.
.jpg")
.jpg")
.jpg")
.jpg")
.jpg")
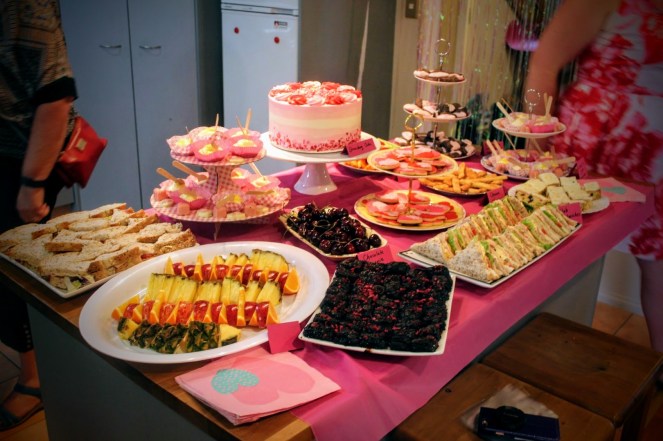
Yes, we brought out the icing for cookie decorating again! Yes, there were more heart-shaped balloons than you could shake a stick at. And yes, the food was predominantly pink but glorious:
.jpg")
.jpg")
.jpg")
We had generous guests who brought along plates of fruit, sandwiches and gluten-dairy-free brownie. I planned the other sweet treats that we displayed on pretty tiered cake stands:
- The cupcakes are actually cheesecakes: lemon and gingernut, the unbaked type. They were inspired by a Donna Hay recipe, and according to my father-in-law, are so good they are worthy of being a Christmas Day dessert! 😀 I’ll come back to them in a future blog post with the recipe. The wee chocolates on the same cake stand are made from pink candy melts filled with Barker’s dulce-de-leche.
- Meringue hearts are an indisputable staple food item for these parties, hearkening back to a time when E and I were flatting together {room-mates} and decided to bake for our friends at Valentines. Except we misread the meringue recipe and pumped up the oven waaaay too high… burning our beautiful heart-shaped treats 😦 We didn’t make that mistake this year though, and it was my idea to half dunk each one in chocolate, which ended up making a cool swirled effect.
- The heart & lace biscuits were inspired by Rose Bakes: I used this great recipe for soft sugar cookies that hold their shape when baked and won’t break your teeth, mixed up royal icing from a packet {cheap and easy} to outline and flood the cookies, made some cake lace and cut out cute pieces that I glued onto the icing with tylose glue once it dried.
.jpg")
.jpg")
.jpg")
.jpg")
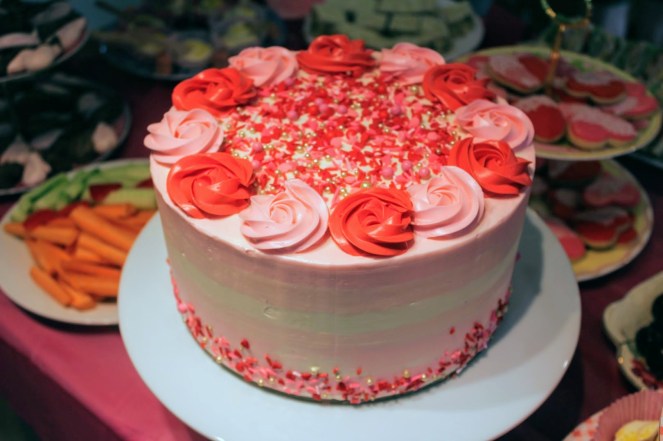
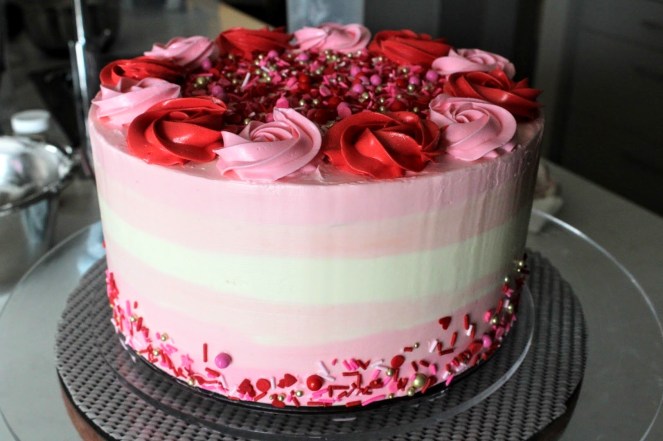
And for the pièce de resistance, this year I made a strawberry cake and iced it with Swiss meringue buttercream (SMBC), creating ombré pink stripes, pretty rosettes and a dusting of twinkly sprinkles:
Here are the cakey deets:
- I used this BraveTart via Serious Eats recipe for the cake itself, although I was short a third of the freeze-dried strawberries (I used pre-ground) so I substituted with freeze-dried ground raspberries. Although the batter did smell more like rasps, the flavour was undisputedly strawb thanks to all the strawberry puree also in it! It made a lovely light cake that got lots of compliments.
- It was filled with a combination of 1:4 cream cheese to SMBC, beaten together until well combined. Any more cream cheese and the icing wouldn’t emulsify, so go easy on it!
- The SMBC I use is based on BraveTart’s recipe here, but I use slightly different ingredient ratios. I’ll post my specific formula as a separate recipe, since Swiss buttercream is a pretty big deal to get one’s head around and I’ve changed tack on it over the years.
- Those twinkly sprinkles are Sweetapolita’s Secret Admirer medley that I ordered especially for the event! *swoon*
.jpg")
.jpg")
If you’d like a play-by-play of the decorating techniques I used, keep scrolling!
Tutorial: Ombré Stripey Buttercream Cake with Rosettes & Sprinkles
I had two inspirations for decorating this cake: a brightly striped I am baker creation and this gorgeous Iven oven buttercream wreath cake. Oh yeah, and the sprinkles! My cake was 9″ round and approx. 4″ tall so the quantities of SMBC and sprinkles that follow relate to those dimensions.
- Start with a crumb-coated cake, chilled just enough to firm it up (approx. 30 minutes). Then take it out of the fridge for around 10 minutes before applying your decorating buttercream, so that doesn’t solidify on contact! This is especially important if you’re icing a cake when your kitchen is cold / on a cooler day. Also, having the cake sitting on a solid cake board that is lightly bigger than the cake itself will really help you with scraping the icing smooth later.
- Prepare three shades of icing from very light to medium. I used a cute gel colour called ‘Rosy Pink’ made by Cake Craft. I prefer to make the darkest shade first to a small amount of buttercream, then remove what I need for the darkest shade {around 1 & 1/2 cups} and add white SMBC to the rest to get one shade lighter {reserve around 1 cup}. I repeat this to get my third and lightest shade, although remember you need LEAST of the lightest pink shade {around 3/4 cup} compared to the other shades, so be careful not to make too much! Ombré designs use an awful lot of buttercream… Make sure you have a bunch of white {at least 1 & 1/2 cups} leftover at the end.
.jpg")
.jpg")
- Spread a little white SMBC on top of your cake leaving a border of approx. 2 inches for the rosettes. Sprinkle your sprinkles {about 1/4 cup!} evenly across this area until you are happy with the coverage.
.jpg")
.jpg")
- Mark the height of each stripe on the cake around the outside of the cake as guidelines: grab a Wilton-size #124 or #127 piping tip (or a large narrow slit in a ziplock bag, as long as it’s the same tip you will use to pipe those ombré stripes) and mark dots in the crumb coat icing vertically, one tip-width apart to the top of the cake. This is easy to do with a toothpick 🙂 Do a set of vertical dots at quarter turns around the cake then join them up to act as a guide for your stripes {don’t panic if your lines are crooked like mine!}
.jpg")
.jpg")
- Pipe your stripes: I started with my lightest colour (white) as I was going to use the same piping bag to pipe all the shades of buttercream, but if you have multiple piping bags you could take the more straightforward route of starting at the bottom and working your way up. My cake was tall enough for six stripes, so I did strip #4 first (white), then stripes #3 and #5 on either side (palest pink), then stripes #2, #6 and the top edge of the cake shown in picture five below (medium pink), and lastly stripe #1 (darkest pink) around the bottom edge. Some of the stripes I piped over twice to ensure I had a thick enough layer of icing to scrape away in the next step – as long as the icing comes out further than the cake board it’s sitting on.
.jpg")
.jpg")
.jpg")
.jpg")
.jpg")
.jpg")
- Smooth your stripes: Ahhh, the satisfying part we’ve been waiting for… With a sturdy bench scraper or other straight-edged scraping tool, rest it perpendicular {at right angles} to the side of the cake against the sturdy cake board edge, and in one smooth, sweeping motion, scrape your way around the cake. I only went a short distance {one fifth to one sixth of the circumference at a time?} before wiping my scraper clean on the side of a bowl, then going back to do the next section. You’ll find that holes/bubbles might appear: use small bits of leftover buttercream applied with a palette knife to fill the gaps, then scrape around that section of the cake again. You can do as many fixes as you like, but remember, imperfections add character 😉 When you’re happy with your stripes, scrape very lightly once around the whole cake {without stopping if possible} to remove any vertical lines from your separate scrapes. Lastly use a palette knife to smooth the top edge towards the centre of the cake {remembering it will be partly hidden by rosettes!}.
.jpg")
.jpg")
.jpg")
.jpg")
- Apply last sprinkles and prepare for rosettes: It’s a good idea to place your cake on a baking tray before adding the sprinkles around the bottom edge, to catch any jumpers! Holding just a few sprinkles at a time, press them into the bottom edge of the cake, then add smaller sprinkles around them. This can take a bit of time to get the effect you want! I probably used about 4 Tbsp of sprinkles for the bottom edge {including the ones that got away!}. Next, work out how big your rosettes will be and mark holes around the top edge of the cake at rosette width-intervals – try and make sure there is an even number of holes if you want to alternate colours.
.jpg")
.jpg")
- Pipe your rosettes: What better way to show this than with a gif?! I used around 1/2 cup red {coloured with Americolour Super Red} and 1/2 cup darkest pink SMBC to pipe six rosettes of each colour using my trusty Wilton #1M piping tip, one on each hole made with a toothpick in the last step. Remember to shake as much air out of the piping bag before having a go at rosettes {don’t fill the bag more than half full}, practice on a plate first, and keep the pressure of your hand on the bag constant until you release the rosette. Good luck!

And lastly, admire your cake {or wish you had more time to take photos of it!!}
I hope this tutorial has helped you – please let me know if you’ve tried this design or a similar one.
Happy end-of-V-Day month to you and belated happy Galentine’s Day to all the gals out there, from my gal pal E and me {and Baby SN who can’t help but be in this photo} ❤ ❤ ❤
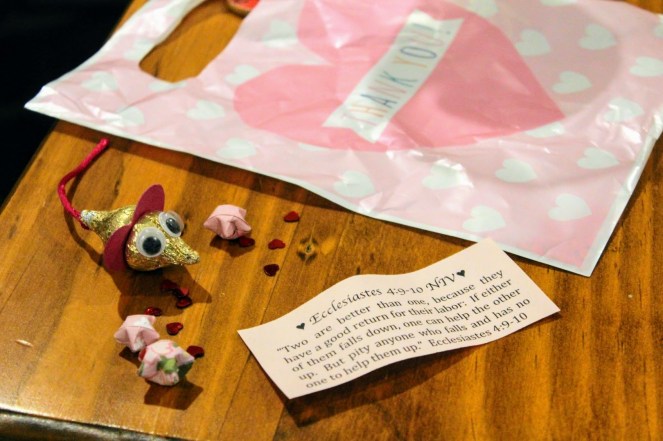
P.S. Here is the contents of our special goodie bags that we sent our G-Day guests home with: