
Where did January go?!?? Happy New Year anyway! And happy summer weather, if that’s what you’re enjoying (like us Christchurchians). I hope your resolutions – if you care for them – are still intact.
Summer = fresh berries.

And barely a stitch of summer at that: I (and everyone else in the city/country it seems) goes gung-ho for strawberries the weekend before Christmas to sit atop a festive pavlova, then if we’re lucky there’ll be a couple of randomly-selected weeks of sunshine during January for raspberry picking, and on the heels of that will be the end of the blueberry season. The fresh berry season is unacceptably short and I demand a refund.

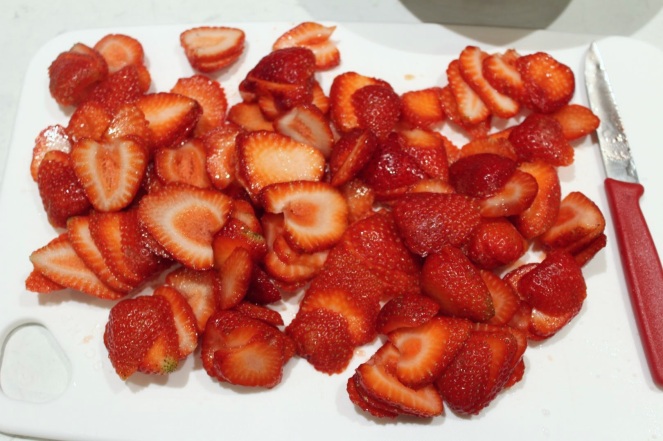
I only recently (begrudgingly) acknowledged aloud that fresh berries are best enjoyed… fresh. Sounds obvious, but my tendency when I stumble on a particularly delicious ingredient is to try and work it into whatever will next exit my oven. Not always the best idea, especially since the summer heat is making the oven (and the additional heat it adds to our already stuffy house) particularly unappealing. So I decided I needed a dessert with minimal cooking and maximum fresh flavours – not a bad idea, no?! Also: you don’t need perfect strawbs for this recipe, since half of them are sliced up and the other half are pureed into syrup. So it’s a great way to use discounted berries in a way that displays them at their best!
Can I just say, I dislike recipes that flagrantly disavow the roots of a classic as much as the next purist. So if you scoffed at the words ‘strawberry’ and ‘tiramisu’ in the same sentence, I can’t blame you. But what do you call a dessert that is tiramisu in all its components except the coffee is replaced by strawberry syrup? Some US recipes might call this ‘strawberry lasagne’ but lasagne is only ever a savoury dish to me. And if I say tiramisu, the vast majority of you know what I mean, even vaguely, so I beg for the benefit of the doubt just this once and suggest we refer to this hereafter as ‘that dessert that tastes like summer’.
 Below I give you two serving options based on whether you would rather serve your tiramisu in a large lasagne-type dish or in individual glasses. The latter requires fewer ingredients but the former has ‘economies of scale’ (and ginormous servings) in its favour.

Also, in case you aren’t fond of lady finger / savoiardi biscuits – and your house is cool enough to turn on the oven – I’ve done the large dish version using homemade buttermilk cake. I had some buttermilk leftover from making this to-die-for Smitten Kitchen strawberry milk, so I trialed Rosie’s buttermilk cake from my new copy of the eponymous Sweetapolita Bake Book {how have I lived so long without it?!}. I can’t help but be inspired by Rosie’s creative genius so watch this space as I work my way through her gorgeous book.

Strawberry Tiramisu
Strawberry Syrup
For a large dish (at least. 7″ x 11″ and at least 2 1/2″ deep, 6 huge or 10 medium servings – guess which we ate…)
- 350g strawberries, hulled and sliced (resulting in approx. 2 cups)
- 1/3 c sugar (approx. 85g)
- 1/3 c water or 1/4 c water and 2 Tbsp berry liqueur
For individual servings (6 glasses – mine were approx. 300mL spirit glasses)
- 100g strawberries, hulled and sliced
- 4 Tbsp sugar
- 4 Tbsp water
- 1 Tbsp berry liqueur (optional)
- Stir all ingredients together in a small pot.
- Bring to the boil then turn heat down and simmer for 10 minutes.
- Process the mixture in a blender or using a stick blender until no solid berries remain.
- Strain out the seeds with a fine sieve, then mix in liqueur (if using).
.jpg")
.jpg")
.jpg")
.jpg")
Lady Finger Biscuits or Buttermilk Cake (adapted from Sweetapolita)
For a large dish:
- 1 packet (200g) savoiardi / lady finger biscuits
OR
- 3/4 c (180mL) buttermilk, room temperature
- 1 1/2 tsp vanilla bean paste or vanilla extract
- 3 large eggs (approx. 50-55g each)
- 1 3/4 c (207g) plain flour (cake flour)
- 1 1/4 c (246g) caster sugar (superfine sugar)
- 2 1/2 tsp baking powder
- 1/2 tsp salt
- 1/2 c (120g) butter, cold and diced into approx. 1/2″ cubes
- 4 tsp (20mL) vegetable oil
- A 9″ x 13″ baking tin
For individual servings:
- 1/2 packet savoiardi / lady finger biscuits (i.e. 100g out of a 200g packet)
OR
- 1/3 c (100mL) buttermilk, room temperature
- 1 tsp vanilla bean paste or vanilla extract
- 2 large eggs (approx. 55-60g each)
- 1 1/4 c (140g) plain flour (cake flour)
- 1 1/4 c (165g) caster sugar (superfine sugar)
- 1 1/2 tsp baking powder
- 1/4 tsp salt
- 90g butter, cold and diced into approx. 1/2″ cubes
- 4 tsp (20mL) vegetable oil
- A shallow 9″ x 9″ baking tin
- Preheat your oven to 175°C (350°F), conventional setting (i.e. not fanbake). Line your baking tin with non-stick baking paper to cover the base and at least 1 1/2″ up the sides.
- In a measuring cup (e.g. a pyrex jug) whisk together the eggs, 1/4 cup of buttermilk and the vanilla.
- In the bowl of your stand mixer fitted with a paddle attachment, or in a large bowl if you are using a hand beater, whisk together the flour, caster sugar, baking powder and salt.
- Turn on the mixer or beater to low speed and add the butter a couple of pieces at a time, every 10 seconds or so. Add the vegetable oil and mix until all the butter and oil are combined with the flour mixture (you may want to scrape down the sides of the bowl and beater/s once or twice during this process).
- While the mixer/beater is off, add the buttermilk then gradually turn the mixer up to medium speed to combine, beating for around four minutes. Reduce the mixer/beater speed to low and gradually pour in the egg, buttermilk and vanilla mixture. Beat for one minute to combine, then scrape down the sides of the bowl and beater/s and fold the batter a couple of times to combine.
- Pour the batter into the prepared tin and back in the middle of the oven for approximately 30 minutes (check from 25 minutes) until a skewer comes out clean or with cooked crumbs only. Let cool on a wire rack for 15 minutes then turn cake onto rack to finish cooling. When cooled to room temperature and ready to use, cut cake into sponge finger approx. 1/2″ wide and 4 1/2″ long.
.jpg")
.jpg")
Mascarpone Cream (from BraveTart / Serious Eats)
This is a cooked egg cream filling (as pregnancy necessitates) but arguably tastes ‘less eggy’ than other recipes, according to pastry chef extraordinaire Stella Parks. No need to panic if you don’t have a food thermometer, the timing and colour change of the mixture should see you right. The recipe below is Stella’s, in my voice. Also great to use in your regular, coffee-flavoured tiramisu recipe!
For a large dish:
- 5 large eggs (approx. 50-55g each)
- 1/2 c (100g) sugar
- 1/8 tsp salt (if you have flaked or koshering salt, use 1/4 tsp)
- 680g mascarpone, cold
For individual servings:
- 2 large eggs (approx. 50-55g each)
- 3 Tbsp (40g) sugar
- A pinch of salt
- 270g mascarpone, cold
- Fill a small saucepan with about an inch of water. Bring it to the boil on your stove top and turn the heat down so that it maintains a simmer (usually this is at a low-to-moderate heat setting).
- Place eggs, sugar and salt in a heatproof bowl (this could be a stand mixer bowl) and put the bowl on top of the saucepan, making sure it isn’t touching the simmering water . Stir the mixture constantly with a spatula, making sure you scrape the bottom and sides of the bowl often, until it has heated to 71°C (160°F) or until the mixture has changed to a darker colour (see pictures below – don’t worry that some parts of the egg will go darker than the rest, they will whip together fine). Remove bowl from heat immediately.
- If using a stand mixer, tip the mixture into the mixer bowl (if you weren’t already using it to heat the egg mixture in) and fit the mixer with the whisk attachment. If using a hand beater, use the beater attachments unless you have whisk attachments (use those instead!). Whip the mixture on high speed until thick and foamy and increased as much as four times in volume (this can take between 5 and 10 minutes). It should mound up on your spatula a little, and dollops taken from the bowl then dropped back in should take at least 30 seconds to absorb.
- Turn the mixer/beater speed down to medium and add the cold mascarpone around 1/4 cup at a time, continuously. When all the mascarpone has been added, stop the mixer/beater and scrape the bowl with your spatula, then turn the mixer/beater back on to medium-high and beat until the mixture is thick and incorporated (usually no more than 30 seconds). In Stella’s own soothing words: “Don’t fret over small flecks of mascarpone, since they will smooth out on their own over time.”
Note: I made the mascarpone cream the day before I assembled the dessert: it was a bit runny the next day, but after re-whipping it for a couple of minutes it had thickened enough to assemble with the other components. There is a fine line walked when whipping mascarpone – it has been known to split irretrievably from over-whipping – so watch it carefully while you whip!
.jpg")
.jpg")
.jpg")
.jpg")
.jpg")
.jpg")
And finally to assemble…
You’ll need the three components above (strawberry syrup; ladyfinger biscuits or buttermilk cake; and mascarpone cream) and a large punnet of approx. 350g strawberries, hulled and sliced. Steps apply to both serving dish types unless specified.
- Place the Strawberry Syrup in a shallow container and dip each lady finger biscuit or buttermilk cake finger into it, making sure to soak all sides. For the large dish: arrange biscuits / cake fingers in the bottom of the dish in tightly-packed rows. For individual glasses: you may need to break the biscuits / cake fingers in half so they fit in the base of each glass.
- Arrange sliced strawberries in a single layer on top of the biscuits / cake fingers.
- For the large dish: cover the strawberries layer with half of the mascarpone cream and smooth the top as best you can (a palette knife can be useful). For individual glasses: distribute half the mascarpone cream between the glasses and cover the layer of strawberries with it.
- Repeat steps 1 to 3 with the biscuits / cake fingers, strawberries and mascarpone cream.
- Use any leftover strawberries to make a design on top!
Here are the pictorial steps for the large dish preparation:
.jpg")
.jpg")
.jpg")
.jpg")
.jpg")
.jpg")
And for the individual servings…
.jpg")
.jpg")
.jpg")
.jpg")
.jpg")
.jpg")
So, there are a few steps in there but I promise it’s worth the effort! Just look at those satisfying rows!!

I’d love to know: is it berry season where you are? How do you best like to eat berries when you can get your hands on them? I hope you can enjoy this or another berry-filled sweet treat soon – they’re perfect for Valentine’s Day!
And speaking of V-Day, E and I are preparing for our second-ever Galentine’s Day celebration so I’ll be back soon with a download of how it goes! If you’d like to see what we got up to (and ate!) last year, check out this post.


Beautiful. Strawberry season is almost upon us here in Florida. Yay! Cannot wait to try these.
LikeLiked by 1 person
Thanks Cathryn! It is such a great time of the year! I hope you get to have lots of berry-filled treats when the strawbs come along 🙂 Thanks for stopping by, I’m looking forward to checking out your blog!
LikeLiked by 1 person