
The southern-hemisphere summer is fading – not news for New Zealanders!! But the warmer weather (almost) always feels so short-lived, and soon I’ll be putting away my t-shirts to exchange them for more woolly options.
I guess I was hoping this last month of summer would linger, but even though we got that extra leap-year day, here I am at the start of March trying to get a post done for the month that was!
I’ve got bit of a back-log of wedding cake pictures that I’m keen to share plus I’m hankering to do some recipe development soon {when it stops being #sohotinthekitchen !}. But right now I just want to put up the details for a cute and colourful baby shower cake I did recently.
 This one was for my boss at her surprise baby shower/farewell. We were so careful to keep it secret until the end – and it worked!!! She may have forbidden us to hold a farewell for her… but as she didn’t specifically use the words ‘no’ and ‘baby shower’ in the same sentence, I took it as permission 😉 She hasn’t found out the sex of her baby so I opted for rainbow to cover all the ‘boy’ and ‘girl’ colours!
I designed this cake with two new skills in mind: covering a cake in 100s and 1,000s (also known as nonpareils), and applying a paper-transfer design to a fondant-covered cake.

The 100s and 1,000s tier first… I got the idea from a beautiful recipe book that Nathan bought me for Christmas {at my request! I’m very picky with my cook books!}. It’s Bluebell’s Cakery‘s second book called Sweet and Savoury, in which Karla gives some beautiful pictorials for decorating cakes to get the same simply elegant designs that she’s known for. Her tutorial for covering a cake with 100s and 1,000s suggests starting with a refrigerated, buttercream-covered cake, applying a thin layer of additional buttercream, then – get this – rolling the whole thing in a tray of the tiny candies!! I thought this seemed like too much fun to be real, so I gave it a go…
I started with my buttercreamed cake which I iced by first spreading a blob of buttercream on top of it, placing a large square of baking paper onto it, flipping it and making sure it was level, applying buttercream to the sides, and using my trusty metal bench scraper to get the smooth sides in line with the base board on top (which is still upside-down in the photo below).

After refrigerating this tier for a good hour or so, I took it out and added a tiny amount of buttercream onto the side and top of the cake. Then I opened three big packets of 100s and 1,000s and emptied them into a try lined with baking paper.

Then came the fun bit: I turned the tier on its side and, with a small piece of baking paper to protect the top from my hand, I rolled the cake in slowly through the 100s and 1,000s! To do the top of the cake, I added a thin layer of buttercream to it and sprinkled the sprinkles on top til it was covered.
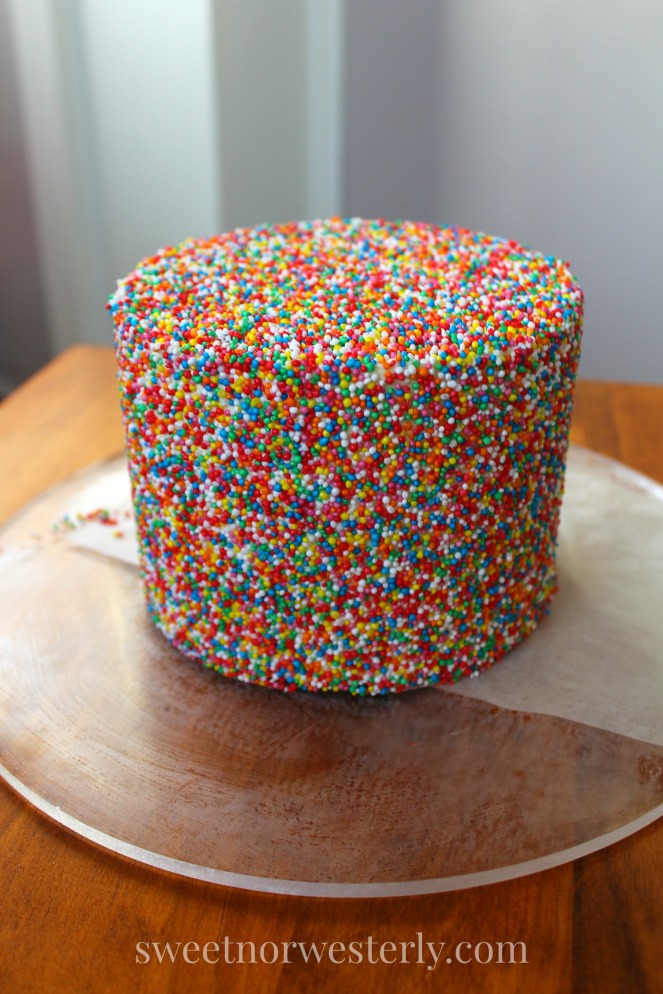
Sadly I couldn’t take a photo and roll the cake at the same time, so here’s a (cameraphone) shot straight afterwards!

And some better ‘after’ shots of the sprinkled goodness:

Now onto the bottom tier: I got the idea for this design from a fantastic Craftsy class by Jessica Harris where she demonstrates how to apply a chevron pattern to a fondant-covered cake using baking paper to act as a ‘sticker’ for the chevrons. This cake wasn’t quite tall enough for chevrons, so I stuck with some striking rainbow stripes 🙂

I started by mixing approximately equal quantities of fondant and modelling chocolate like Jessica does – Bakel’s Pettinice fondant to help it stretch and dry a bit, modelling chocolate (made using The Cake Engineer’s great recipe) so that it cuts cleanly and sits solidly. I coloured small amounts in similar shades to the ROYGBV colours of the 100s and 1,000s that I used for the top tier, and let the coloured pastes sit for a little bit (in hope they would become less sticky!).

In the meantime, I’d measured the circumference around the cake (666mm) and worked out that I wanted three sets of the six colours (222mm each set, including gaps between each colour), which meant that each colour in each set would measure approximately 20mm across the horizontal. If I’ve lost you, don’t worry… if geometry wasn’t my strong suit, I would have just decided on the width of the strips and kept going around the cake until I ran out of space! But this way they matched up 😉 It ended up that my strips were about 15mm wide (not quite following the Pythagoras Theorem, if you do the math!), which left a smaller gap between colours, but I liked the way it looked anyway!
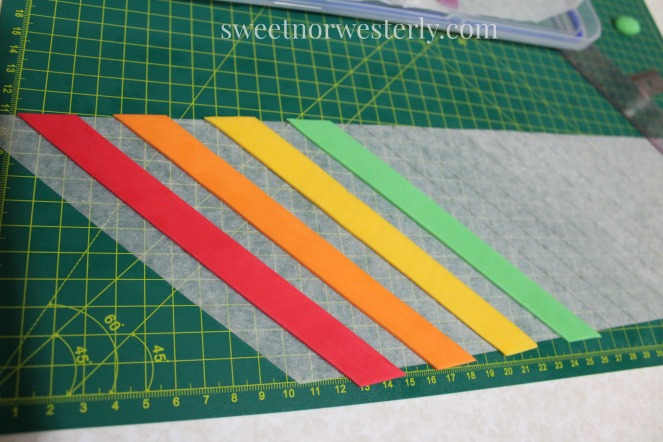
In the end, the paste was too sticky to roll by itself, so I rolled it out between sheets of baking paper, like you do for cookie dough. From each colour of rolled-out paste I used an ‘Xacto’-style craft blade to cut out three or four strips 15mm wide and long enough for the height of the cake when placed at a diagonal. I used my handy self-healing craft mat and my new quilting ruler (a neat tool that Jessica recommended in her class) to rule straight lines the same thickness across, because you can see through the ruler’s grid to get the right width by lining up with the first cut. I put the strips in front of a fan for half an hour or so to try and dry them out a little to avoid stretching them before transferring them onto the ‘sticker’.

Speaking of the ‘sticker’- I started with a long strip of baking paper cut to the same height as the cake. I used the guidelines on the mat to rule 45° lines with 20mm spacings on the underside of the sticker (to keep pencil lead off of the colours), enough lines for one set of the six colours including gaps. Then I (carefully!) transferred/peeled the pre-cut colour strips onto the sticker, using the ruler to straighten them to the lines I’d drawn.

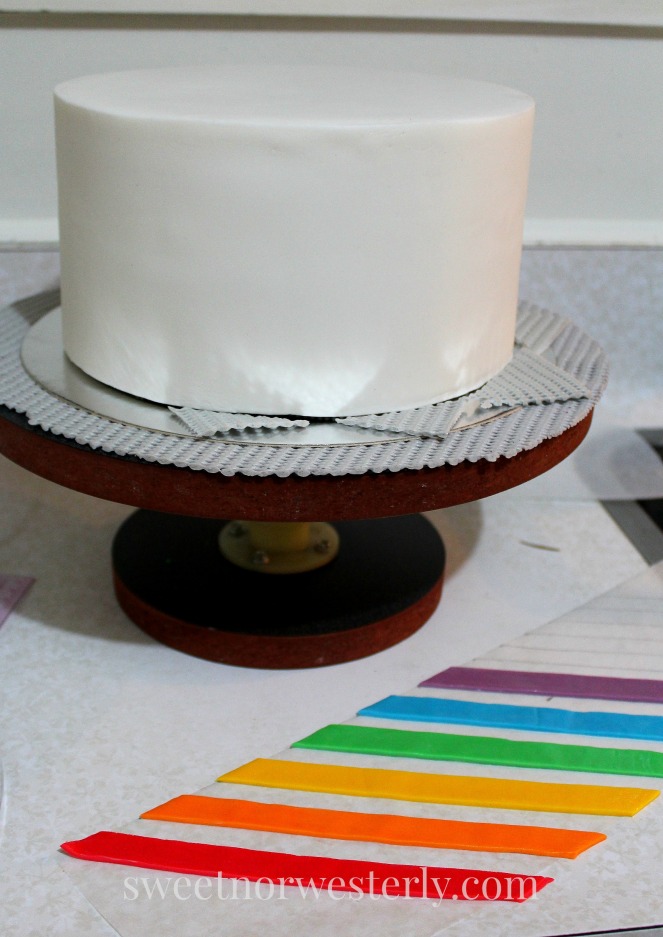
Using the small straight-edge blade that you can see in the top right-hand corner of the photo just above, I cut the coloured strips flush with one edge which was to match up with the base of the cake. I left the soon-to-be top edge a bit longer so I could make it exactly the same height as the cake once it was attached. Then I rubbed some white fat (Chefade) along the coloured strips on the sticker so they would adhere to the cake.
And speaking of attached…I was pretty attached to that sharp edge on the fondant covered cake below!!! 😉 In spite of a few air bubbles, my fondant-covering skills are slowly improving – definitely benefited from Jessica’s fantastic instructions for using the upside-down method to get that edge. In this video at about 4 minutes 10 seconds, Rosie does some upside-down cake magic, but I’m sure I’ve seen a longer tutorial of the technique so will update with that when I find it!
Lining up the flush-cut side of the sticker with the base of the cake, I pressed the strips against the cake, running a finger back and forth along each strip through the baking paper sticker. When I was sure they were all attached I carefully peeled back the baking paper and straightened up any movement in the strips with the quilting ruler.
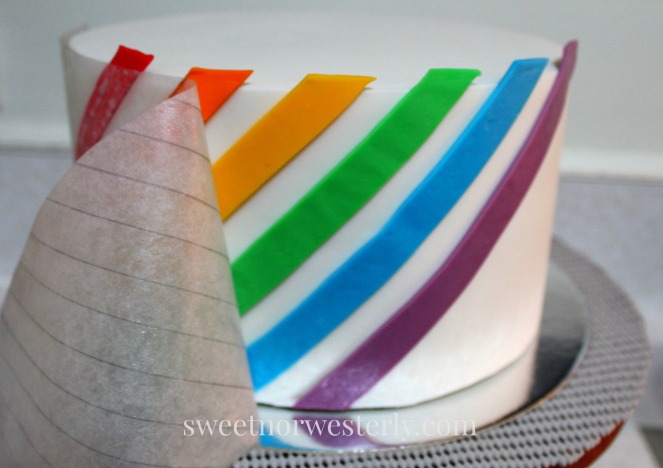
I then set up the sticker again for the other two sets of colours and applied them in the same way. Aaaaannnnndddd… it matched up at the end! Lastly I used the flat blade to cut the extra height from the top of the stripes so they were flush with the top of the cake.

I was really pleased with how it turned out! Next time though I would be more careful to roll the coloured paste to the same thickness as it was obvious when the strips were different thicknesses. If I’d done a bit more planning I might have made a topper to say ‘Hey Baby!’ or something cute like that 🙂 But I got lots of good learning out of it, and I loved being part of the surprise celebration – my boss has been an amazing manager and we will all miss her heaps while she’s on maternity leave, but I’m sure she’ll enjoy spending quality time with her wee one when s/he arrives!


Nice detail!
LikeLike
Thanks! 😀 I tried to check out your blog but the page linked says ‘nothing found’ – do you have a blog somewhere else? 🙂
LikeLike
Haven’t publish a post yet, but it’s already in queue 😀
LikeLike